
Corsica Progress
I'm still dutifully plugging away at the Corisca sweater and i'm really pleased with how its coming up.
I love love love this colour!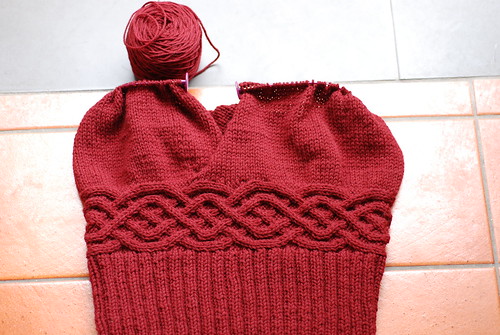
The top half above is done up to the armpits, and i'm now working on the sleeves.
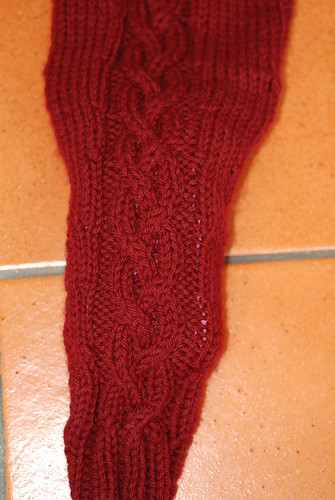
The picture below gives you an idea of how the crossover bit looks, although the colour here is a little bit pinky, it was very hot and bright outside when these were snapped: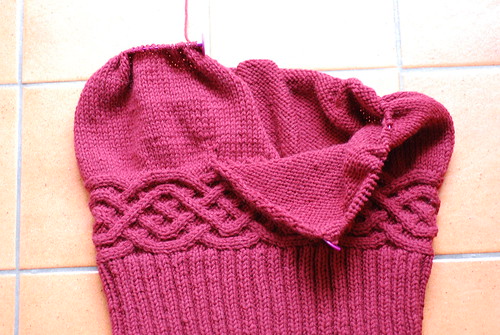
In the pattern the sleeves are worked from the bottom up, with increases either side of the cable and again at the start and end of the row. I was using the two circ's method rather than DPN's (cos i dont have any of the right size).
I dont really like how my increases have come up - i used the KF&B increase otherwise known as the bar increase. I think the fact that I wasnt quite used to using the two circs method of knitting in the round affected how these early increases came up.
its also a little snug around my wrists and forearm, even though i did add four stitches to the recommended number to cast on.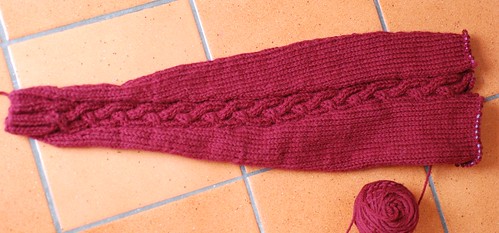
here is a close up of the cable with some stuffing in it to represent an arm :) Loving this Braided cable pattern too, it looks very cool :)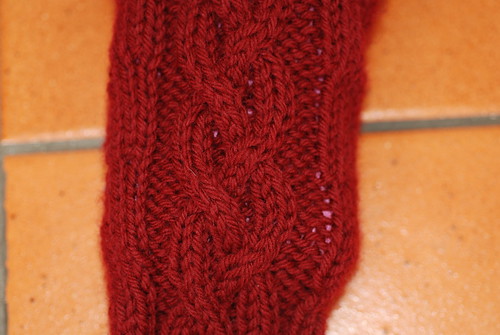
looking back over these pictures, it's not as evident as it is in real life how amaturish the sleeves look. In person they just scream hand knit by someone who's never completed a sweater before. Not that anyone but me is going to notice.... its the age old knitters problem isnt it, as long as I know its like that its going to bug the hell out of me. Especially when i know this is something that i'm going to really want to love and wear all the time.
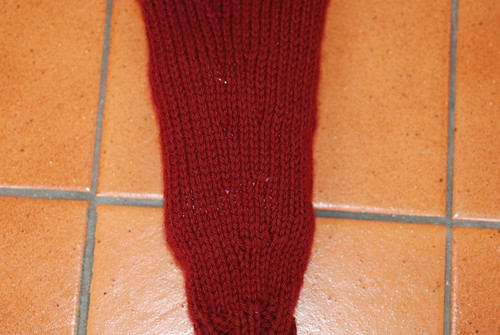
and the back increases:
For the 2nd sleeve, i've decided to work from the armpit down. I've got a provisional cast on of the same number of stitches that i ended up with on the first sleeve and i'm going to k2tog where the increases would have been. My k2tog is much better looking than my M1 sitches.
I also think that i might have to stop decreasing a little sooner so that i have more stitches for around my wrists and forearm.
If that looks a lot better i'm gonna have to rip out this first sleeve and do it again from the top down.... yeah looking forward to that - NOT :(
On some other news I got my International Scarf Exchange 6 buddie details and I can now start looking for some yarn. I think I might tackle the My So Called Scarf pattern for my buddie, in a varigated purple thick n thin yarn i saw at spotlight the other week. Her Fav colour is purple.
Its all very exciting :)
4:54 AM
It looks great so far! Maybe when you are blocking, you could really agressively block the cuff and wrists- that should help a lot.
- Julie top